BACKPACKING BASICS
Welcome to backpacking for beginners; If you are here on this site it is because you love to hike and would like to take the next step in exploring wilderness areas by learning how to backpack, you have come to the right place.
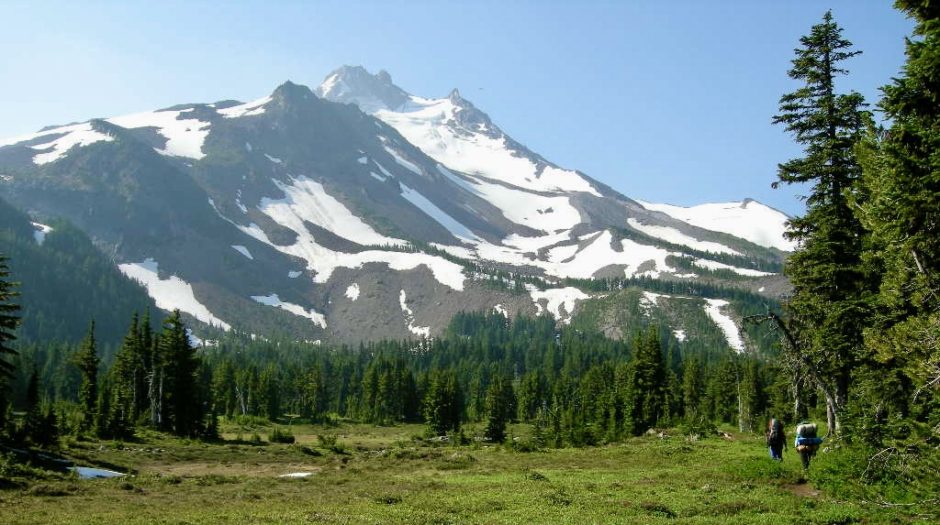
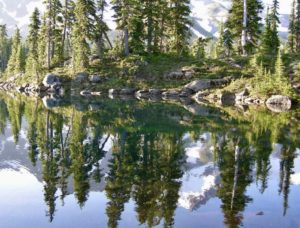
The two main differences between hiking and backpacking is that you can go deeper into the wild and explore things and places that not as many people have seen, and you don’t have to go home at the end of the day. You can be immersed in the great outdoors to experience all of its beauty both day and night. Nothing can compare to waking up in the morning to all the sights, sounds and smells of a wild place untouched by man.
My goal is to share with you the knowledge that I have gained from over 40 years of experience in wilderness travel. In this course you will learn the necessary tools to safely backpack into a wilderness area with confidence and having the knowledge to take care of yourself and the fragile environment that you are traveling through.
Below I have listed 5 topics that you need to know before heading to the trail head. On this website I have also included information for the more advanced hikers and backpackers.
The wonders of nature await, so Let’s get started:
The Hike (Locations);
First you need to decide where you would like to go. This is important because the location and time of year will determine what equipment you will need to take with you and what training you will need. If possible, for your first backpacking trip go with someone that is experienced. I would also recommend a trail that is easy to moderate depending on your fitness level.
Do some day hikes to understand what your fitness level is as it relates to backpacking. Keep track of the elevation gain and the distance that you travel so that when you are reading about different trails you will have a better understanding of what you can handle. Keep in mind, if you have a lot of elevation gain in one day, plan to hike fewer miles. Remember your backpack will be heavier than your day pack was.
Don’t hike any more than 7 to 8 miles a day and plan your first backpacking trip for no more than 3 days. Also pick a popular trail. Trails that are more frequently traveled are usually in better condition, are well marked and there will be other people around if you need help.
Equipment and Clothing;
For a complete list of equipment and clothing that you will need for your backpacking trip, go to the page above “Backpacking Gear List”.
I will sometimes mention a specific brand that I am using or have used that worked well for me. Remember that everyone is different, so at the end of the day it comes down to personal preference. I would like to take a moment to caution you. Buy quality! You are going out into the wilderness. If a piece of equipment fails you cannot run to the store and get another one, you are stuck with it or should I say without it. I have seen this happen many times when I worked as a wilderness guide. The unfortunate individual would become painfully aware (quite literally) that they should have bought quality.
As you look through the “Backpacking Gear List” and start deciding what equipment you will be putting in your backpack, remember that weight matters. The lighter your pack, the more you will enjoy the trip.
When you are looking at equipment, always check the weight. A few ounces will add up to pounds and become a heavy backpack. Also be careful to bring only what you need, if you can live without it, don’t bring it, but be careful not to sacrifice safety.
The items that you put into your backpack can be divided into two different categories; Consumables and Base weight.
Consumables are the items that you will use up during your trip (see “Backing Gear List”). Base weight refers to the weight of your backpack with all the equipment and clothing (minus the consumables and the clothing that you will be wearing on your body).
All the items in the “Backpacking Gear List” are important, but there are some that you should take spacial note of when making your perches choice. I call them the big seven.
1. Hiking Shoes or Boots;
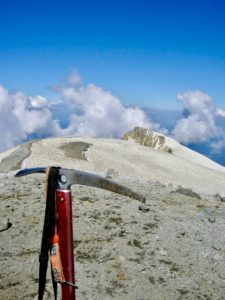
You’re footwear is the number one most important piece of equipment. On a backpack trip your feet take more abuse than any other part of your body. So make sure that your hiking shoes or boots are good quality and fit your feet properly. First you need to decide wither you need a boot or tail runners. This will depend on how heavy your pack is and what terrain you will be hiking through. For example; if you are climbing a mountain on snow and ice you will need a climbing boot, if you are go cross country with a heavy pack you will need a hiking boot with good ankle and arch support, but if you are on a trial with a lite pack, trial runners will work great. Most through hikers (which is anyone hiking more than 500 miles in a single trip) wear trail runners and their backpacks have a base weight of around 18 to 25 pounds. When trying on hiking shoes wear the socks that you will be hiking in. To prevent losing toenails, buy your new shoes at lest a half size bigger than what you would normally wear. Some through hikers will even go one full size bigger. Most people have one foot that’s bigger than the other, So always measure both feet and size your hiking shoes to your biggest foot.
2. Backpacks;
Your backpack is the second most important piece of equipment. Everything that you have goes in your backpack and if it tears or falls apart you are in trouble. Think of your backpack as your home, everything you have is kept inside and stored until you need it. On a backpack trip you bring only what you need, so If you lose something because your pack has a hole or it cannot be secured, you will no longer have everything you need.
There are three things that you need to look for when buying a backpack; The first thing is quality. As they say, “you get what you pay for”. Don’t be afraid to spend a little extra money for a good quality backpack. For one, it will last you for years and two, it won’t fall apart when you need it the most, which is on the trail. As a wilderness guide I have seen this happen many times. luckily for my clients I would alway have a pack repair kit with safety pins, wire and other miscellaneous belts and straps. Doing a trial repair may make your backpack very uncomfortable, so preventing the need for a repair by buying quality is alway a better choice.
The second thing is the design of the waist belt, shoulder strap and back pad system. Most backpacks today have lots of room for adjustments. Go to an outdoor recreational equipment store and talk to a salesman. They can help you find the right size backpack for your body type and make adjustments for a proper fit. Put about 40 pounds in the pack and walk around the store, see how it feels after 10 to 15 minutes. All the weight should be on your hips not your shoulders. It should be comfortable, if it’s not try another pack. If It’s uncomfortable in the store it will be even less comfortable on the trail after it has been on your back for several hours. Remember, you are the one that will be carrying your backpack, so take your time and pick the pack that works for you.
The third thing that you need to look at, is the pack its self. Is it big enough to hold all your stuff without it being too big. People with extra room in their packs tend to try to fill it and end up with a heaver pack than necessary. Having a backpack that has the right volume for your body size and for the length of trips you plan on taking will help you to not over pack and take things that you do not need. As a point of reference. When I was preparing to hike the Pacific Crest Trail, I purchased a new backpack made by Granite Gear called Blaze A.C. 60. I planed to resupply every 7 to 8 days. I am 5’ 9” and my 60 leader backpack worked great.
3. Tent;
Make sure that you pick a tent that is specifically designed for backpacking. Backpacking tents are designed to be light weight and to roll up into a small package that will fit in your backpack. I would recommend getting a tent that is either semi freestanding or free standing. The semi freestanding tents tend to be lighter, but need to be staked out in order to be set up. Freestanding tents are a little more versatile because they can be set up without stakes. You will still need steaks for the rain fly vestibule and I would recommend using sticks on the rest of the tent in case of wind and rain. I would also recommend, that if you are sharing a tent with someone buy a three person tent. This will give you enough room for the two of you and all of your equipment. If you are by yourself go with a two person tent so that you can bring your backpack inside. The only time I would use one person tent would be in an area where rain is unlikely. Most one person tents do not have room for you and your backpack.
4. Tent Foot Print;
I would recommend a tent footprint for two reasons; One, tents are very expensive and the foot print will protect the bottom of your tent from tears and abrasions. Two, if it rains the footprint will help keep the bottom of your tent dry, which in turn will keep you dry.
Most tents have a pre-made footprint available to purchase separately, which is very convenient. The other option is to make your own footprint out of a piece of three mil plastic or a piece of Tyvek. Simply lay the plastic or Tyvek on the ground and set your tent up on top of it. Cut the plastic or Tyvek out to the exact shape of the tent. Make sure your new foot print covers the bottom of the tent, but does not stick out beyond the edge of the rain fly. If it does, water from the rain fly will collect on the foot print and run back underneath the tent and you will get wet.
5. Sleeping Bag;
There are a lot of different types of sleeping bags on the market, be sure to select one that is designed for backpacking. You’ll also notice a temperature rating associated with each sleeping bag, the lower the rating the warmer the sleeping bag. Generally speaking there are two different types of sleeping bags, synthetic and down. The down sleeping bags are usually more expensive, but are lighter, warmer and will also compact to a much smaller size.
When you’re ready to purchase a new sleeping bag, I would recommend a mommy or semi-mommy bag style. Also try the sleeping bag on in the store for size. It may seem strange to be laying on the floor in the middle of a store in a sleeping bag, but you need to make sure that it’s comfortable, so that you can get a good nights sleep when you’re on the trail.
6. Sleeping Pad;
The main purpose of the sleeping pad is to insulate you from the cold ground that you will be sleeping on. This will help keep you warmer at night. If you are able to sleep on the hard ground without any problems then you can focus on getting an inexpensive pad with good insulation. If you need some padding in order to sleep, then I would recommend an air mattress. There are several good quality air mattresses made specifically for backpacking that provide adequate insulation and will give you the comfort that you need. Make sure that your air mattress will roll up small enough to fit in your pack and still be lightweight.
7. Trekking Poles;
If you do much hiking, trekking poles become invaluable. Trekking poles add stability which will save you energy on a long days hike. They also come in handy at stream crossings, climbing over fallen logs and other difficult obstacles along the trail. I would recommend buying a set of trekking poles that are adjustable in length. They can easily be shortened and strapped to your backpack when not in use. For the proper length; Place the handle of the trekking pole in your hand with the tip of the pole on the ground in a vertical position. Your elbow should have a 90° bend.
Food;
Needless to say, when you go backpacking your eating habits will change. Not only are the foods that you’ll be eating different, but the times and frequency in which you eat will also change.
Some people experience a loss of appetite. Don’t be concerned if this happens to you, it is simply your body acclimating to a new environment and the increased activity. It is important however, that you eat whether you’re hungry or not. The average person burns about 2000 cal a day. When you are backpacking you can burn over 8000 calories in a day, so expect to lose some weight. The amount of food you eat will be limited by how much you can carry, so make sure that your food is high in calories with complex carbohydrates and lots of protein.
I would recommend that you eat a good breakfast, but not too heavy or it could be difficult to hike. Oatmeal, Cream of wheat, pancakes or freeze dried breakfasts are all good choices. Lunch is more of a snack brake, which you should be doing all day long to keep your energy level high. Things like protein bars, trail mix, dried fruit, tuna, flower tortilla, peanut butter, cheese, crackers, bagels, anything that you can munch on and not have to cook. For dinner, I like to have a freeze dried meal, they are very lightweight and High in calories from complex carbohydrates and protein. There are a lot of options that are quite tasty, so shop around on line and pike what looks good to you. You can also go to the grocery store and pick meals that only require boiling water; for example instant potatoes, top Ramen and different rice mixes.
It’s always a good idea to bring an extra one or two days of food. You never know when the weather may turn bad and you might be stuck in your tent for an extra day. Or some critter may decide to eat some or all of your food and now you need to share with your hiking partner. Never carry canned food or glass containers. Glass can break and both are heavy. Remember there are no garbage cans in the woods, what you carry in you will need to carry out.
Water;
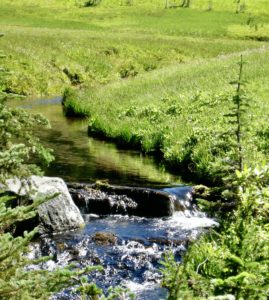
Finding drinkable water is essential on any backpack trip. 1 liter of water weighs 2 pounds 3 ounces, so you are limited as to how much water you can carry because of the weight. In the Pacific Northwest there is an abundance of water, so I rarely carry more than 2 liters of water at a time. However, if you know that you are going to have a dry camp (a camp without a water source), or you are hiking in an arid, semi arid or desert area you may need to carry a lot more water to get you from one watering hole to another. It all comes down to planning ahead, knowing the area that you’re going into and where the water is available.
Once you have found water, you are faced with the big question. Can I drink it? It has been said that if the water is moving its drinkable, this is not always true.
Again know your area. Know what is upstream. Is the
stream that you are about to drink from coming out of a lake that is surrounded by houses? Houses that fertilize their lawns with manure that is washing into the lake and then down the stream? Or is the stream fed by a glacier or coming out of a spring?
These are questions that you can answer by looking at your map and find out where your water source is coming from. No matter where you go it is always best to find the cleanest water source, but still purify your drinking water. There are many pathogens out there that can cause you to become very ill, like E. coli,
Giardia or Cryptosporidium, to name a few. They can all make you very sick for weeks after your trip is over.
There are several different options to purify your water; you can boil, this method is not practical because it uses lots of fuel and takes time, but can be done in an emergency. Some people like using purification tablets because they are extremely lite and take up very little room in your backpack. The down side is the taste and the fact that you are putting chemicals into your water. I always carry purification tablets in my first-aid kit for emergencies. The most popular method of purifying water is a water filter. Water filters add more weight to your backpack and take up more space, but you are drinking chemical free water that still tastes like a mountain stream.
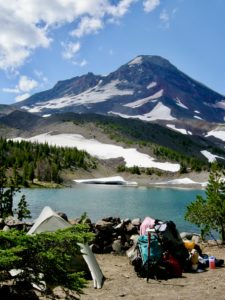
The Camp;
At the end of a long day of hiking it’s important to find a good camping location. If you are hiking on a will traveled trail (highly recommended) there should already be camping spots already available, never make your own.
It is also a good idea to find a place to camp while you still have plenty of daylight. It is nice to have plenty of time to set up camp, make your dinner, maybe go for a swim or just sit back, relax and enjoy the natural beauty of your surroundings. Once the sun goes down it gets cold and it’s much more difficult to set up your tent, get water and cook dinner.
Most people will look for the flattest spot possible to set up their tent; however this is not always the best spot. Yes, you do want to avoid rocks and roots because that can be rather uncomfortable. Sometimes a slight slant is a good idea. Look for a tent spot that will not become a puddle of water if it starts to rain. By looking at the pine needle or leaf patterns on the ground you can determine whether that spot has been a puddle of water before.
Once your camp is set up, never leave anything out or unattended especially food. At night everything should go inside your tent. If you are in an area where bears could be a problem put all of your food, toothpaste and trash in a bear can and place it approximately 100 feet away from camp. This will keep you and the wildlife safe.
Because of the large number of people that use our wilderness areas every year it is important to minimize your impact on the environment by practicing no trace camping. This means that when you leave the area nobody will be able to tell that you were ever there. In fact try to leave it cleaner then when you found it. The only thing you should leave behind is your foot prints. And the only thing that you should take is a photo.
Here are Seven principles of “No Trace Camping” you will need to follow.
1. No littering. Whatever you pack in, you need to pack out. When you get back to civilization you can dispose of your trash in a trashcan.
2. Never wash your dishes directly in a stream or lake. Dip some water out of the lake or stream and carry it away from your camp and water source, then wash your dishes and scatter your cleaning water over
the ground.
3. Do the same thing when you are washing your body. Go 100 feet away from your water source and use a minimum amount of biodegradable soap.
4. When you have to go number two, go at least 200 feet away from any camp, trail or water source. Bury your waist 6 to 8 inch deep. Put your used toilet paper into a Ziplock bag, pack it out and dispose of it appropriately. If you have leftover food from a meal bury it in the same manner as your human waste.
5. Stay on designated trails and never cut switchbacks. Cutting switchbacks can cause erosion.
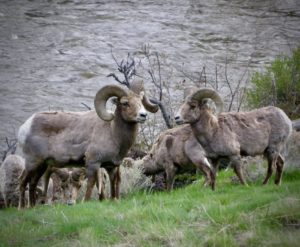
6. Respect wildlife by watching from a distance and not disturbing them. Remember this is their home not yours. Never intentionally or unintentionally feed the wildlife. Place your food and trash in a bear can at night.
7. Never build a new fire pit. In my opinion fires are nice but rarely necessary. The only time you should start a fire is in the case of an emergency and if the fire danger is low.